Deploy a MSK Cluster & Conduktor Platform in one command 
TL;DR 
Using ECS Compose-X and the new x-msk_cluster extension, the complexity creating MSK Clusters and connecting services is highly reduced. We are going to deploy Conduktor Platform , a Kafka management platform to demonstrate just that.
AWS costs for the demo: $2 Checkout the Requisites to use the demo.
Introduction 
ECS Compose-X is soon to celebrate its 3 years of active development. The latest version allows for extensions, in turn allowing to create extension modules for any CloudFormation resources.
As a first proof-of-concept for it, I chose to create the x-msk_cluster plugin to make the provisioning & use of AWS MSK Clusters ever so easier.
Why Kafka? In the past years I have come to using/administering Kafka clusters on a daily basis. If you refer to my previous blog article on managed Kafka service providers , AWS offers amazing features for AWS Customers and integrations to other AWS services.
Why making a demo with Conduktor? 
Management of Kafka resources (topics, schemas, clusters etc.) can be a daunting adventure. There are plenty of different tools out there, some Open Source like the very good AKHQ to help. Last year I got to meet the Conduktor team and their Conduktor Platform offering stood out for me.
Given their very active development cycles, and their support for AWS IAM Kafka authentication, it made it perfect to use as a demo, but also to use as a means to test the x-msk_cluster module.
Installation & Deployment 
Overview 
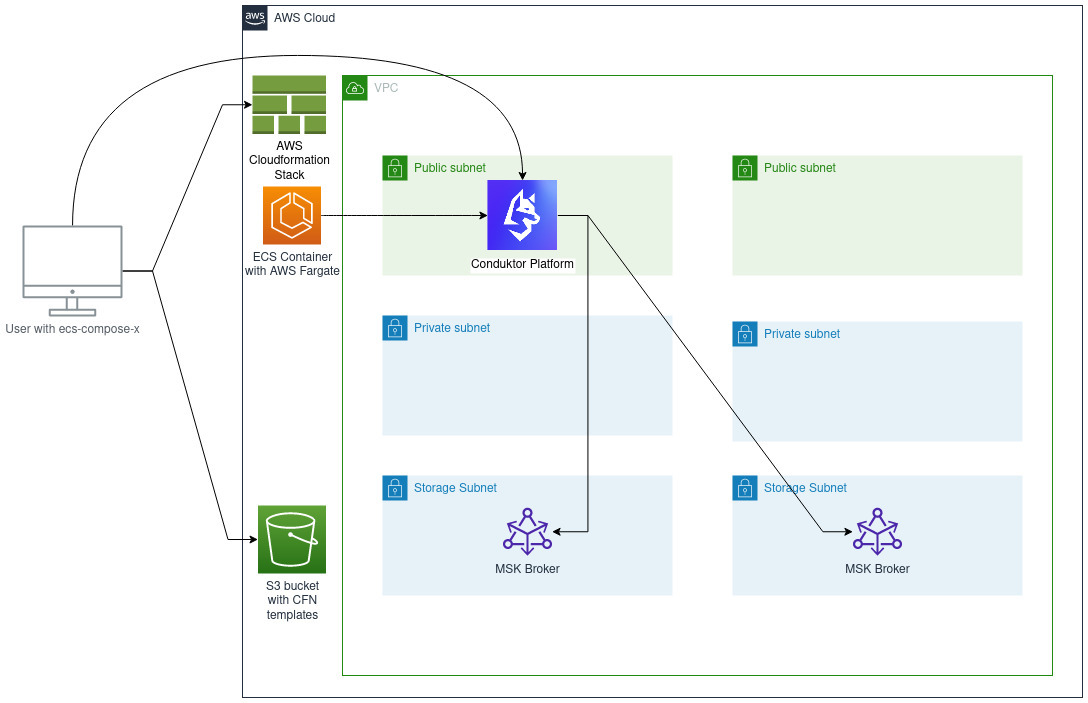
To deploy our demo, we will provision a new VPC, with 3 tiers subnets, put the Conduktor Platform container in a public subnet so we can connect to it from anywhere, and a MSK cluster that will span across 2 zones.
First, we install ecs-compose-x-msk-cluster
# You will need a working python3 installed on your machine.
python3 -m pip install --user ecs-composex-msk-cluster
Deployment 
First, download the docker-compose file for the demo
wget https://raw.githubusercontent.com/compose-x/ecs_composex-msk_cluster/main/use-cases/conduktor.yaml
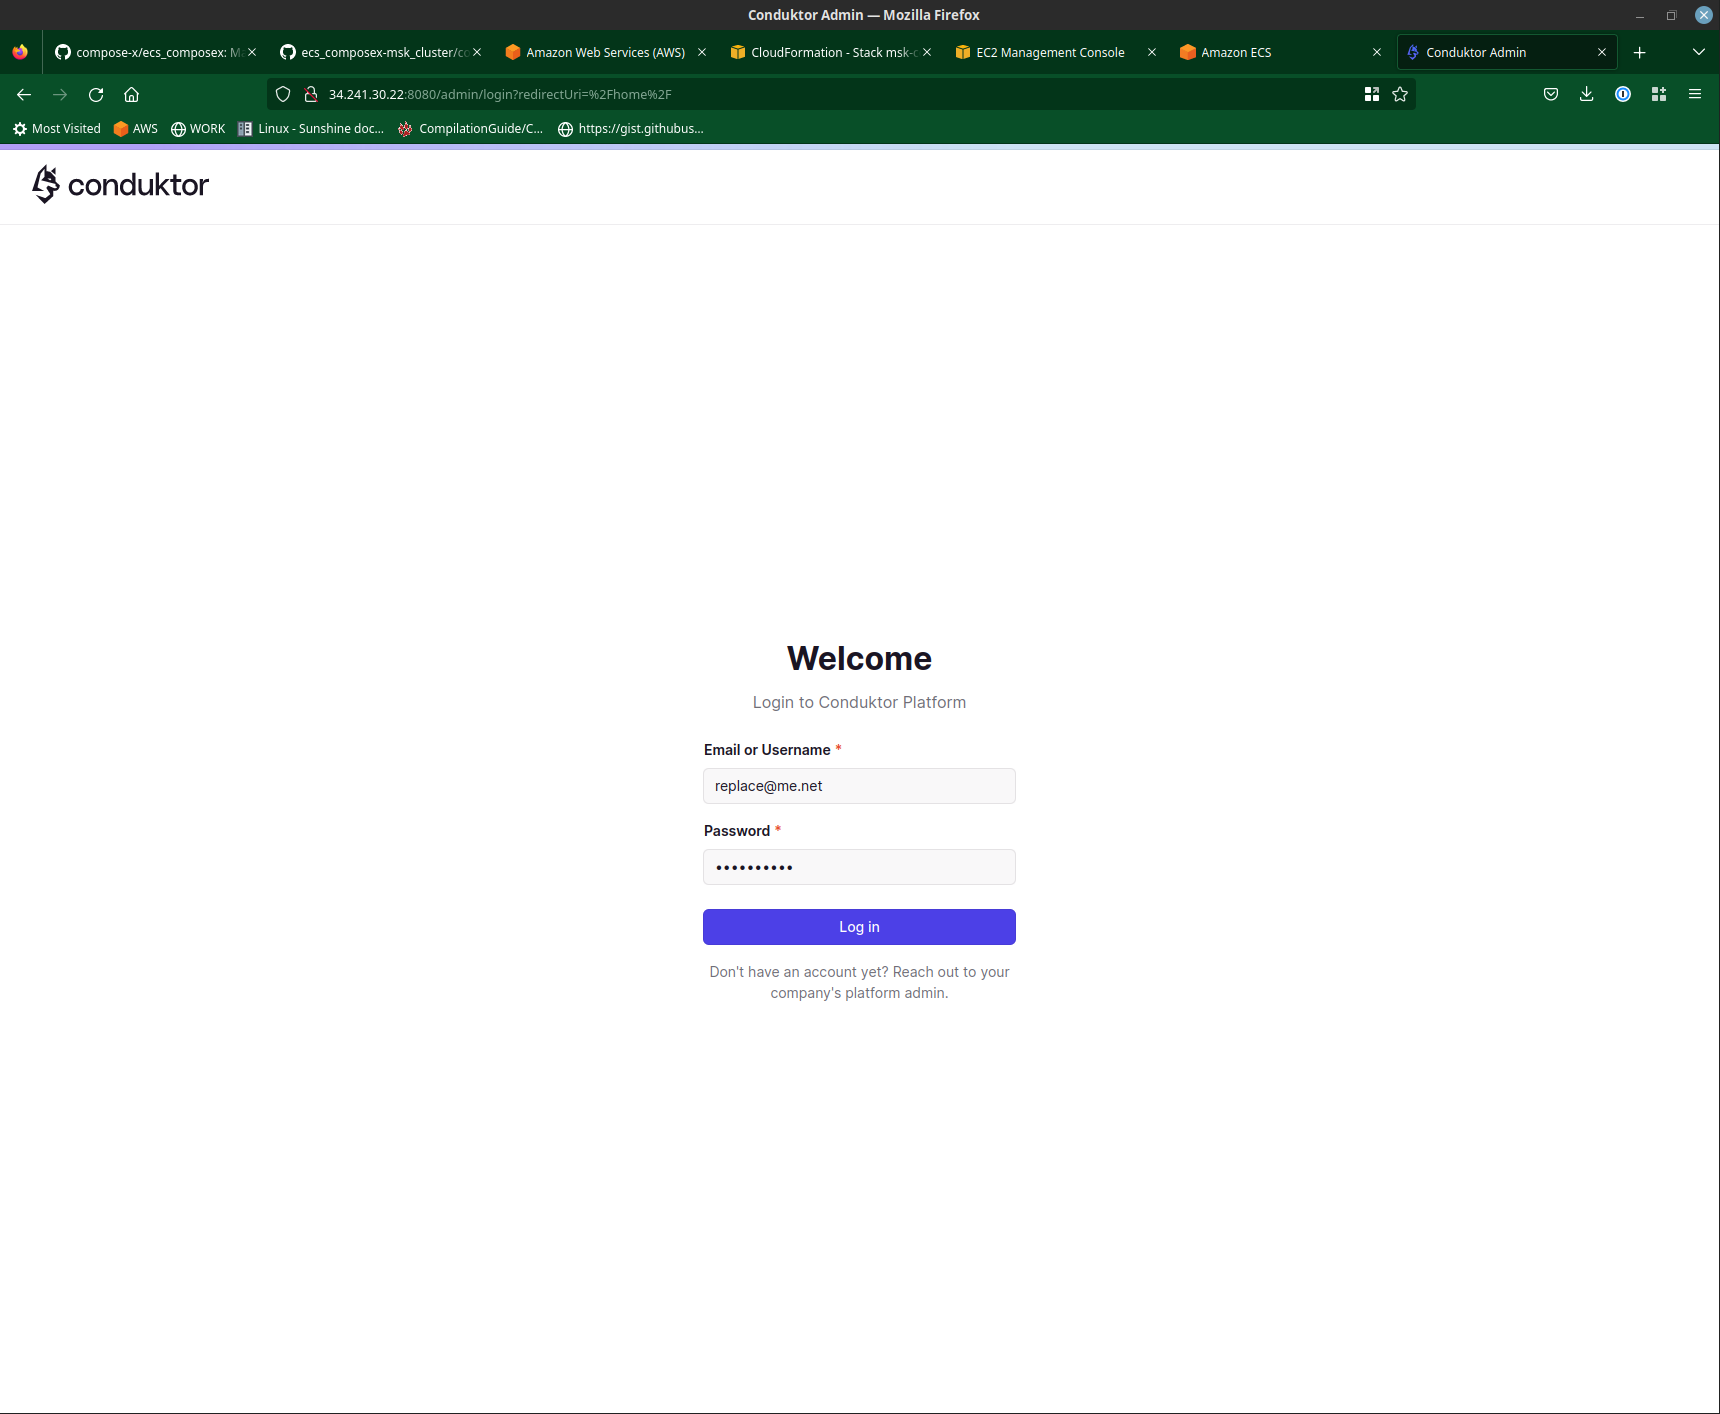
There is a default username & password set for conduktor that are set in the conduktor.yaml file. Feel free to change these if you wish to.
- email: replace@me.net
  password: Repl4ceMe!
Then we simply need to run
ecs-compose-x init && \
ecs-compose-x up -d templates -p msk-conduktor -f conduktor.yaml
When running ecs-compose-x init , the script will ensure that your ECS Environment is ready and the right settings are enabled, then create a S3 bucket to store the generated CFN templates.
The ecs-compose-x up will store the generated templates locally (in the directory specified with -d ) so that you can re-use, inspect or modify those.
It will then create a new stack named with the -p argument, and use the docker-compose file conduktor.yaml as the input.
The MSK Cluster provisioning will take a while (between 30 and 45 minutes).
Post-deployment testing 
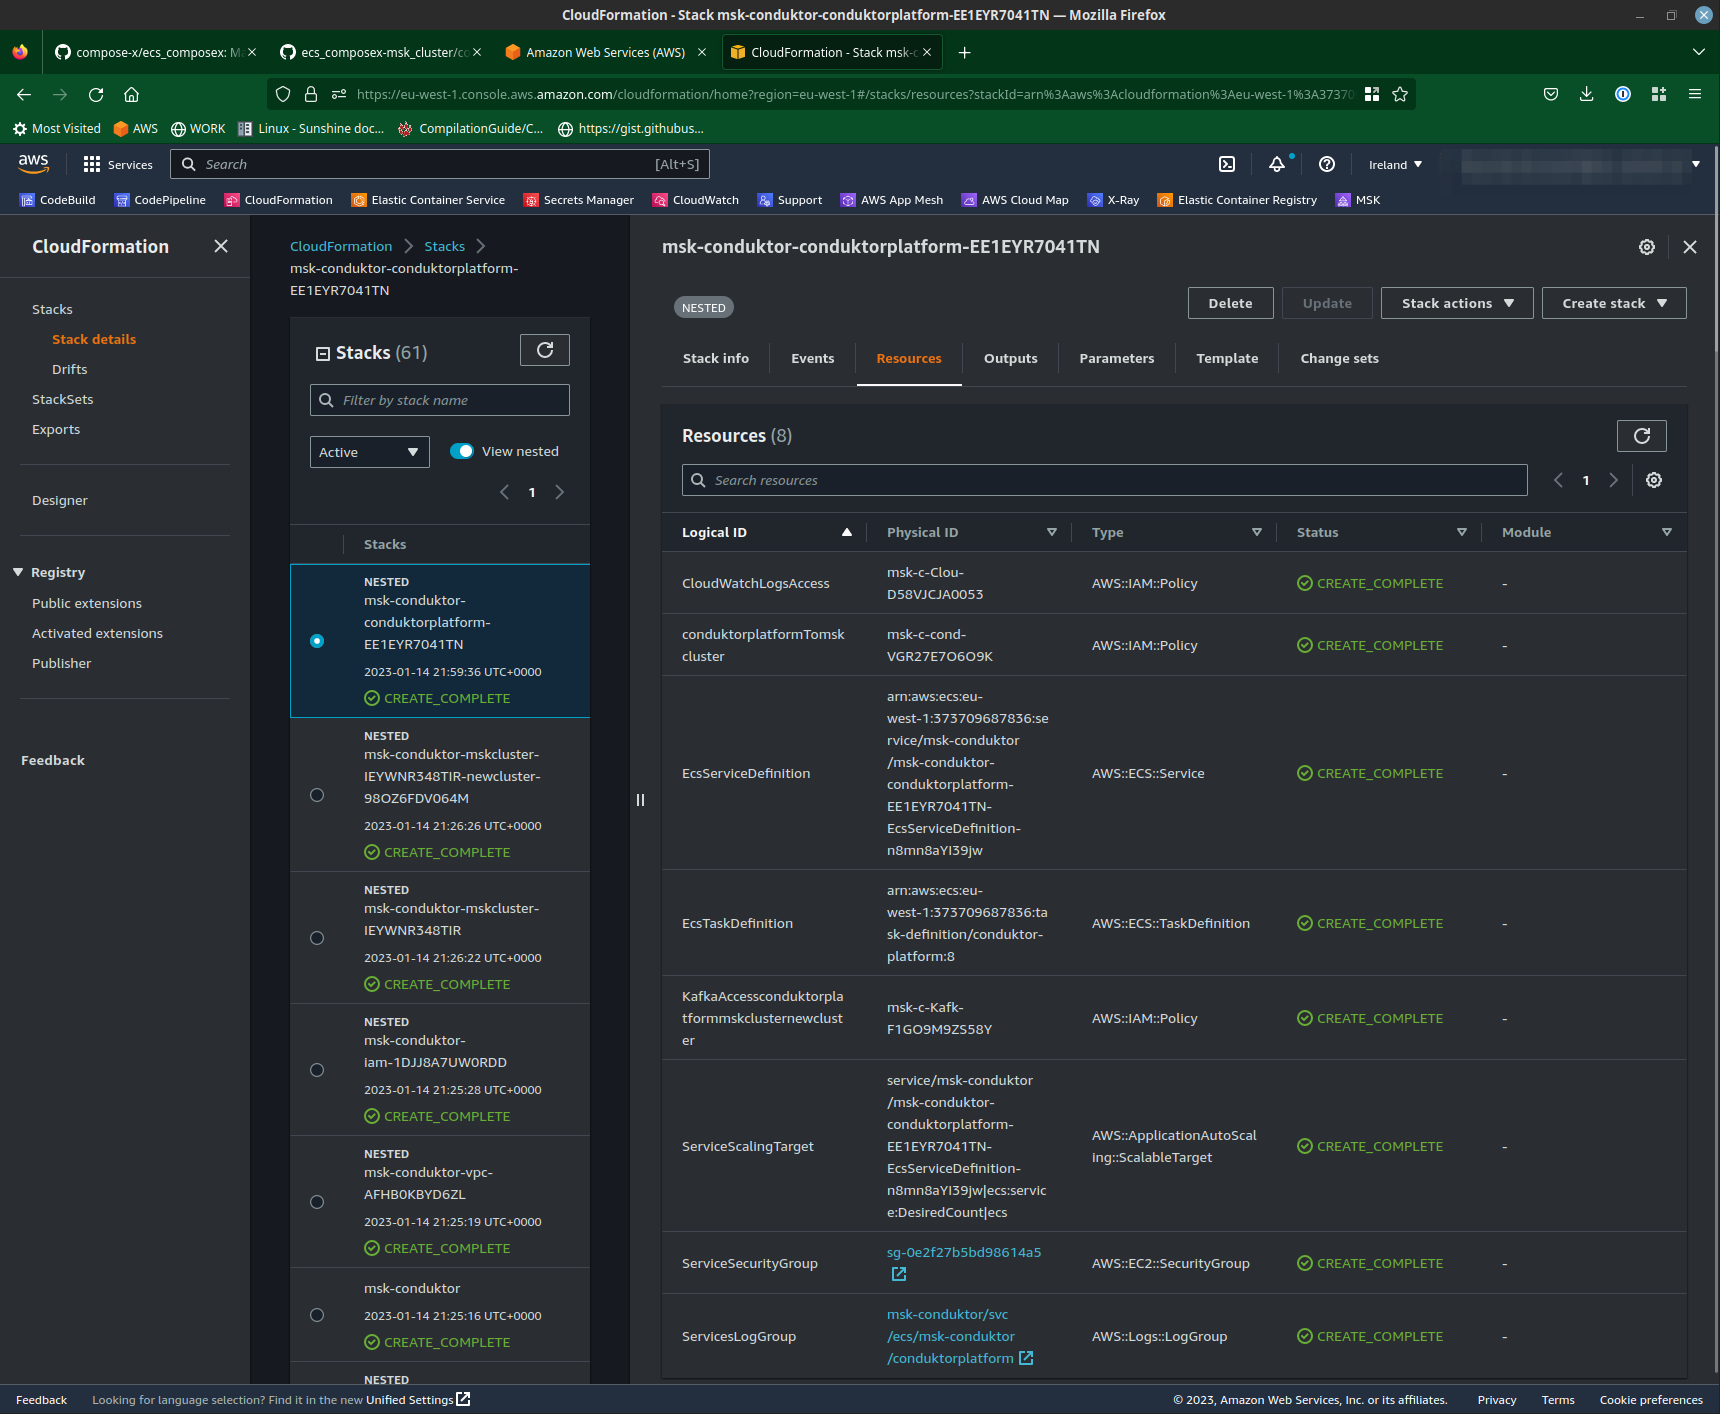
Head to AWS CloudFormation service and identify the conduktor-platform service stack
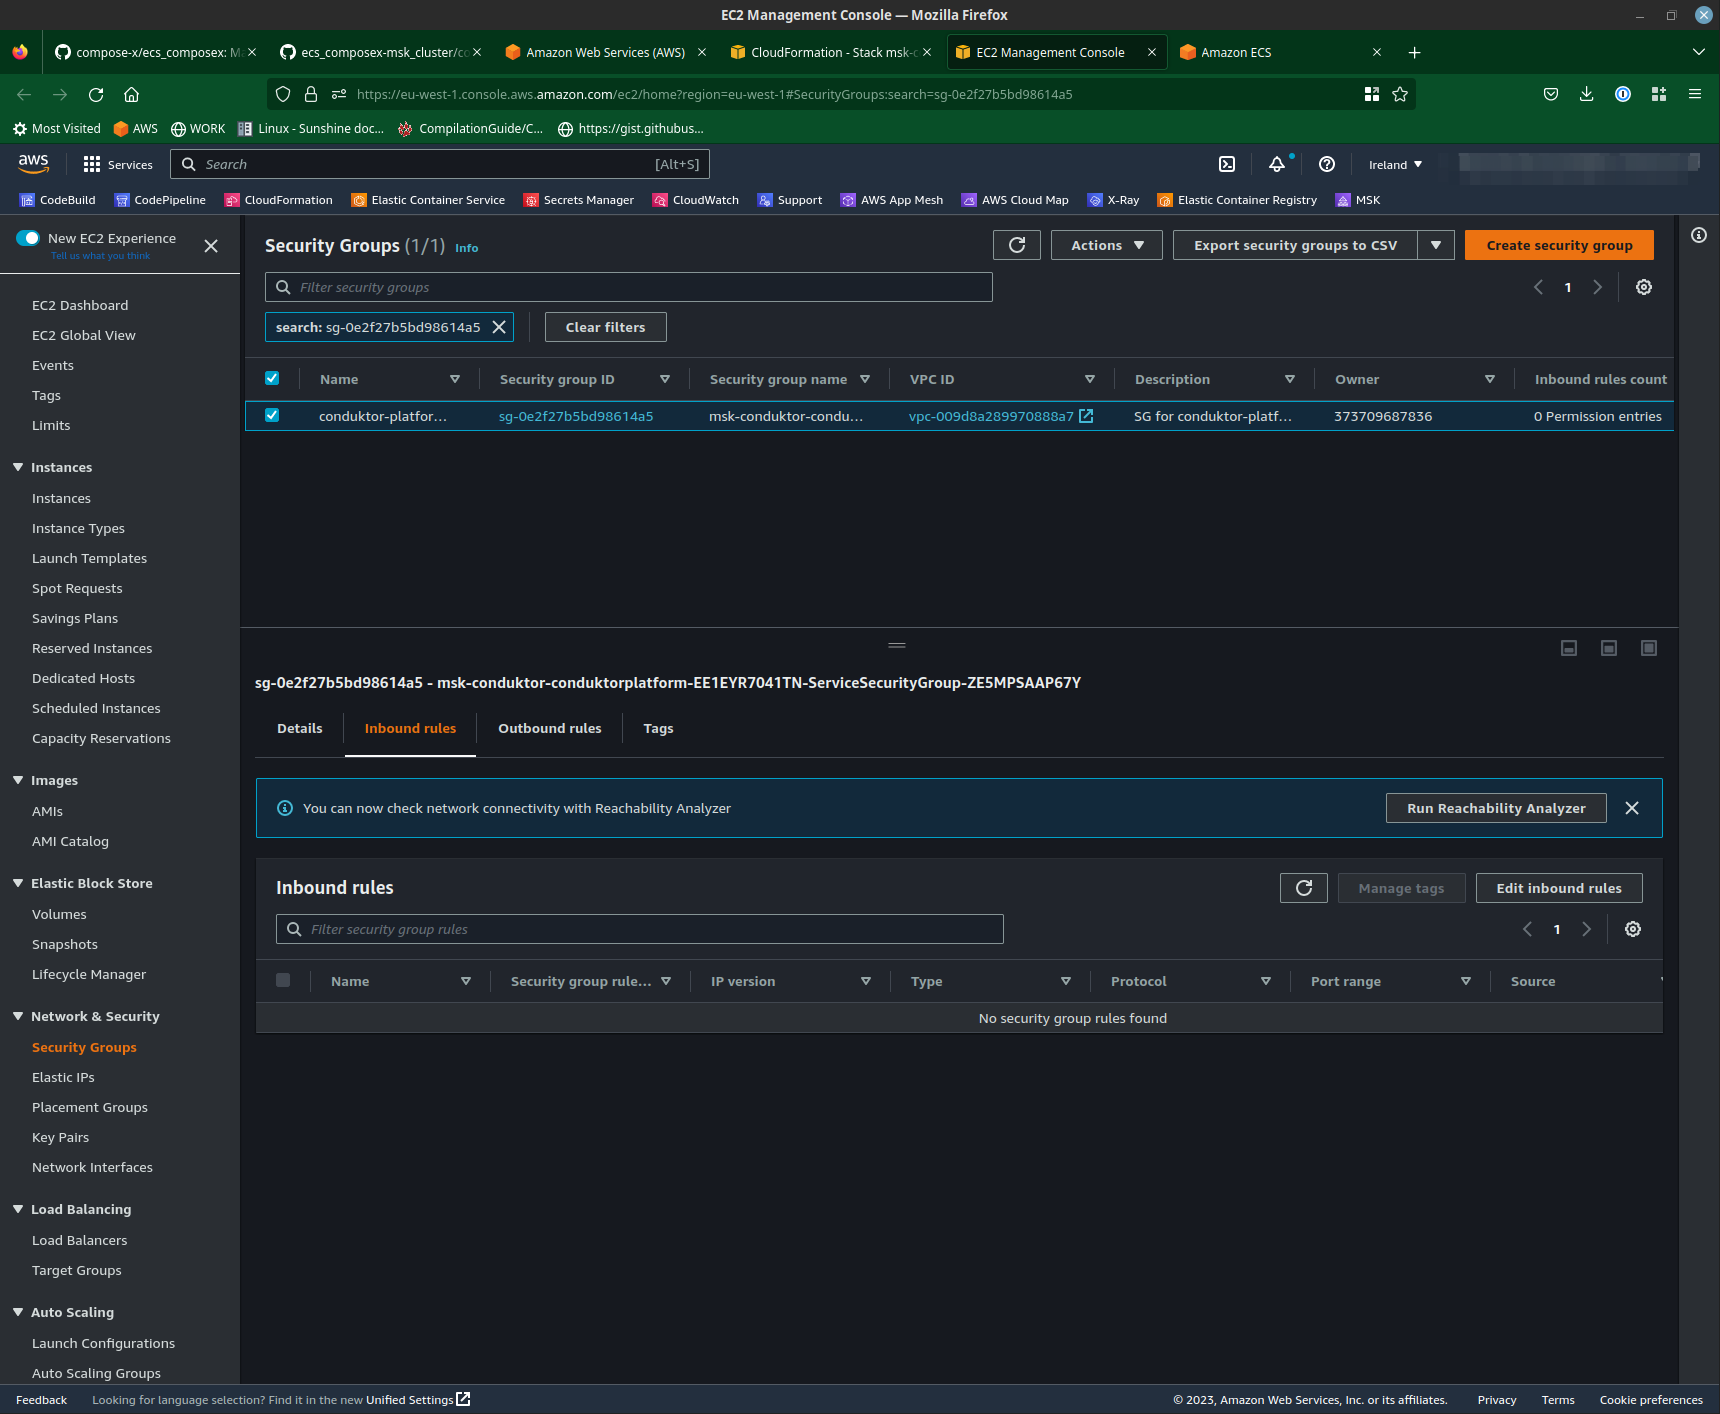
There, we first head to the Security Group to allow access to the container from our IP address. This is not open by default for security purposes.
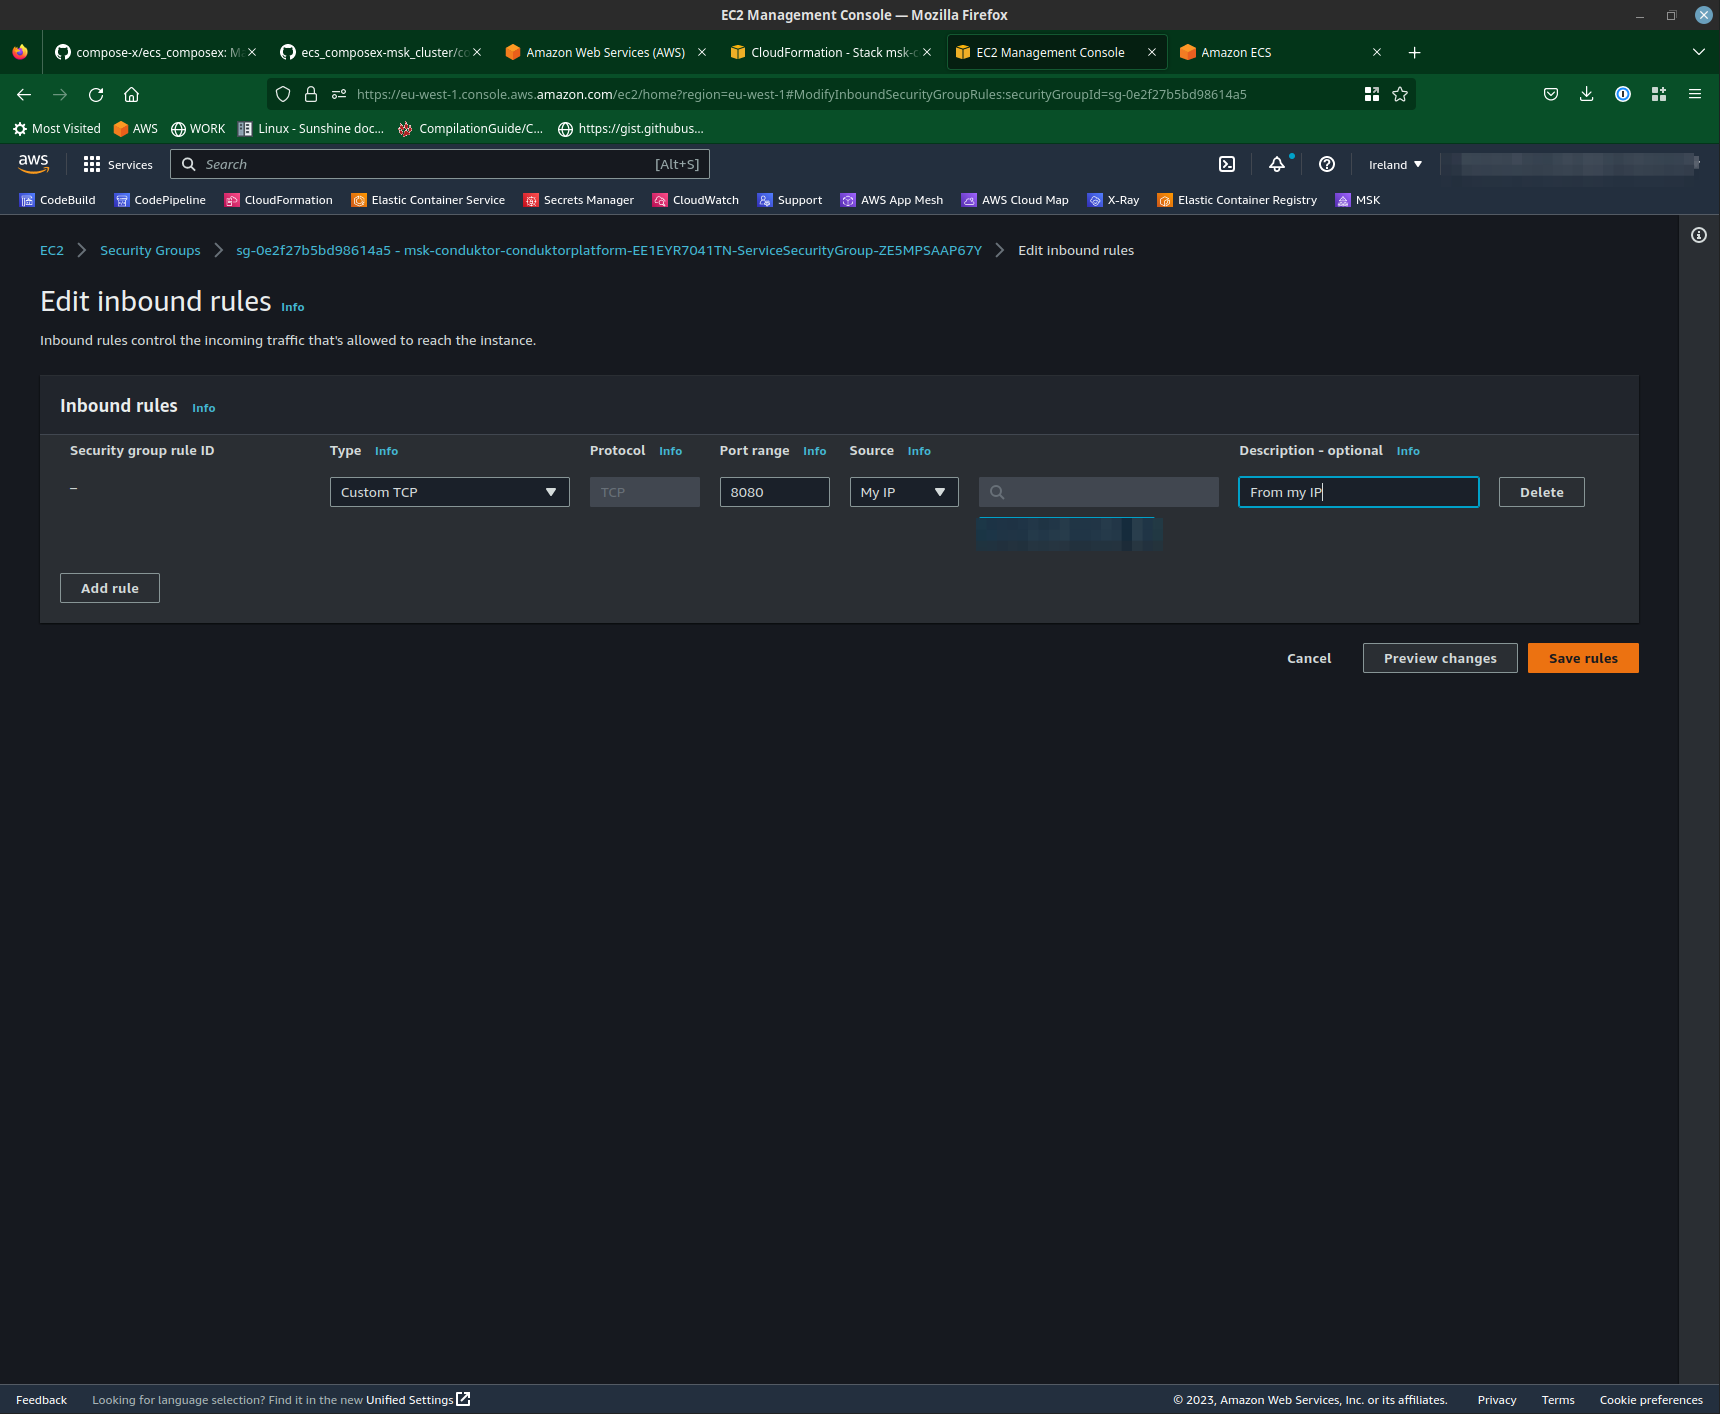
If you wish to enable it from the conduktor.yaml file, comment out the Ingress section in the conduktor-platform service.
Now to connect to Conduktor, we head to Services -> Elastic Containers Service. In clusters, you will find a newly created cluster called msk-conduktor .
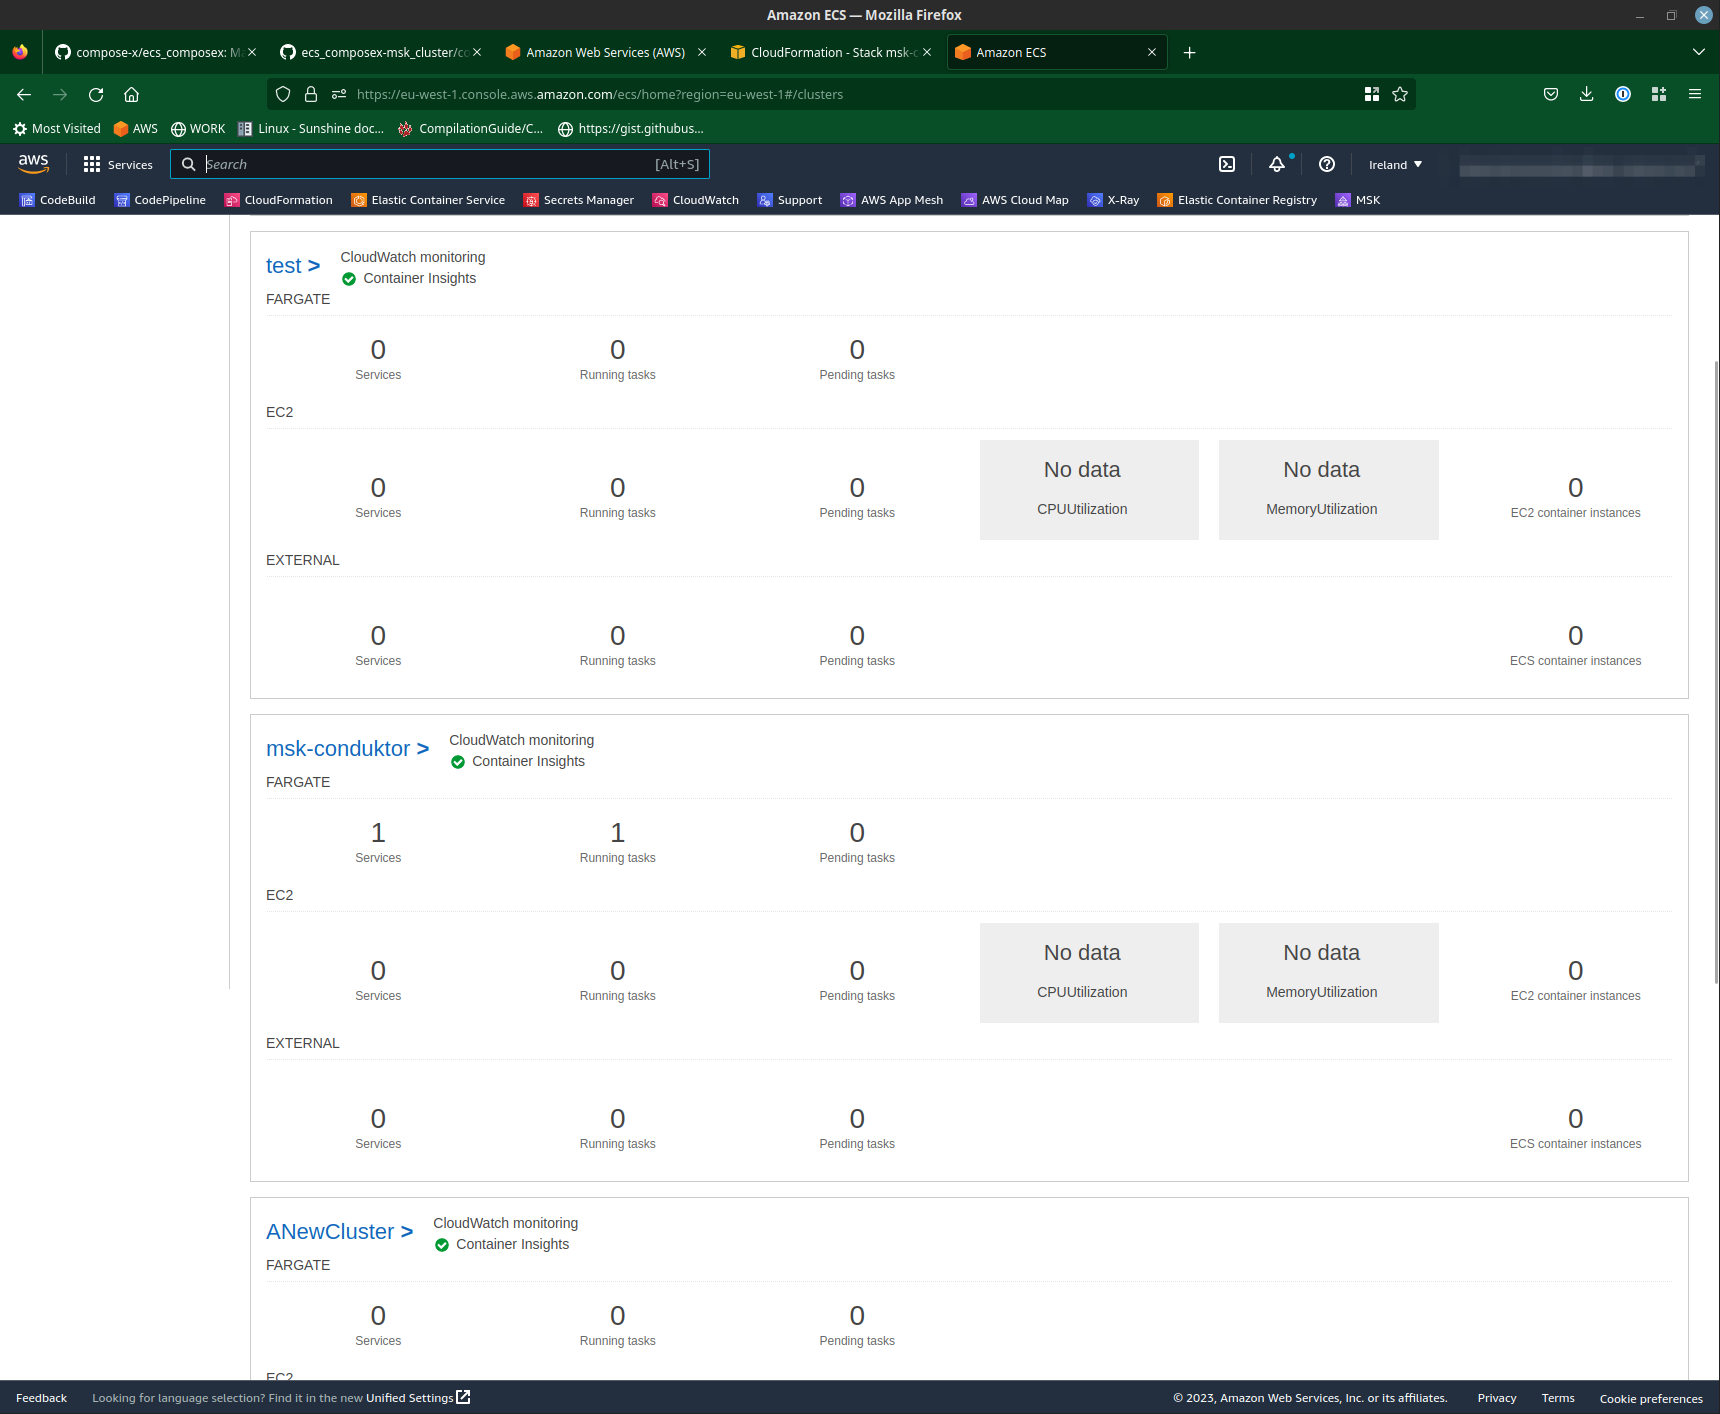
By selecting it, you will land on the services page. There you will find the newly created Conduktor service.
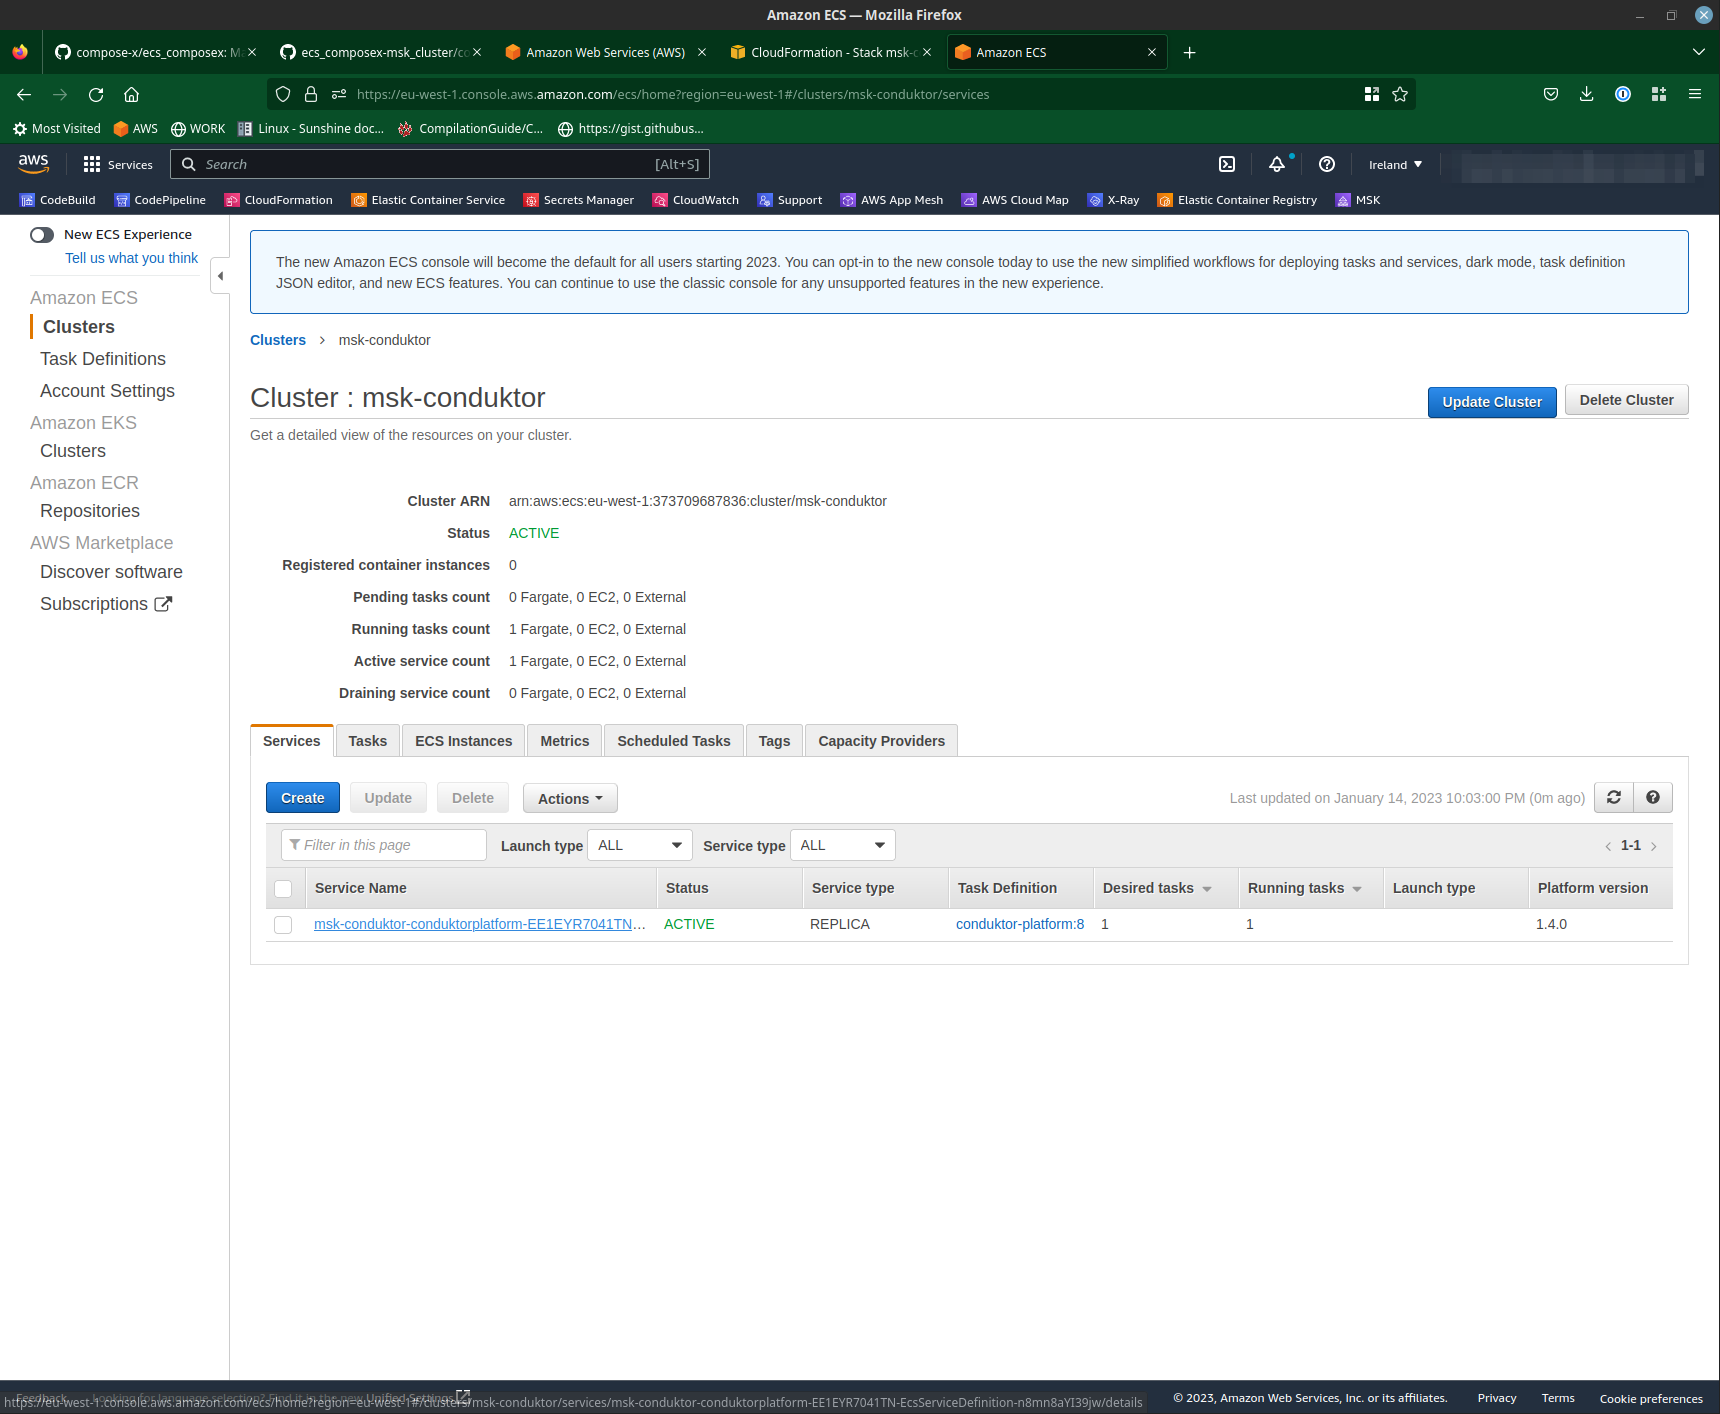
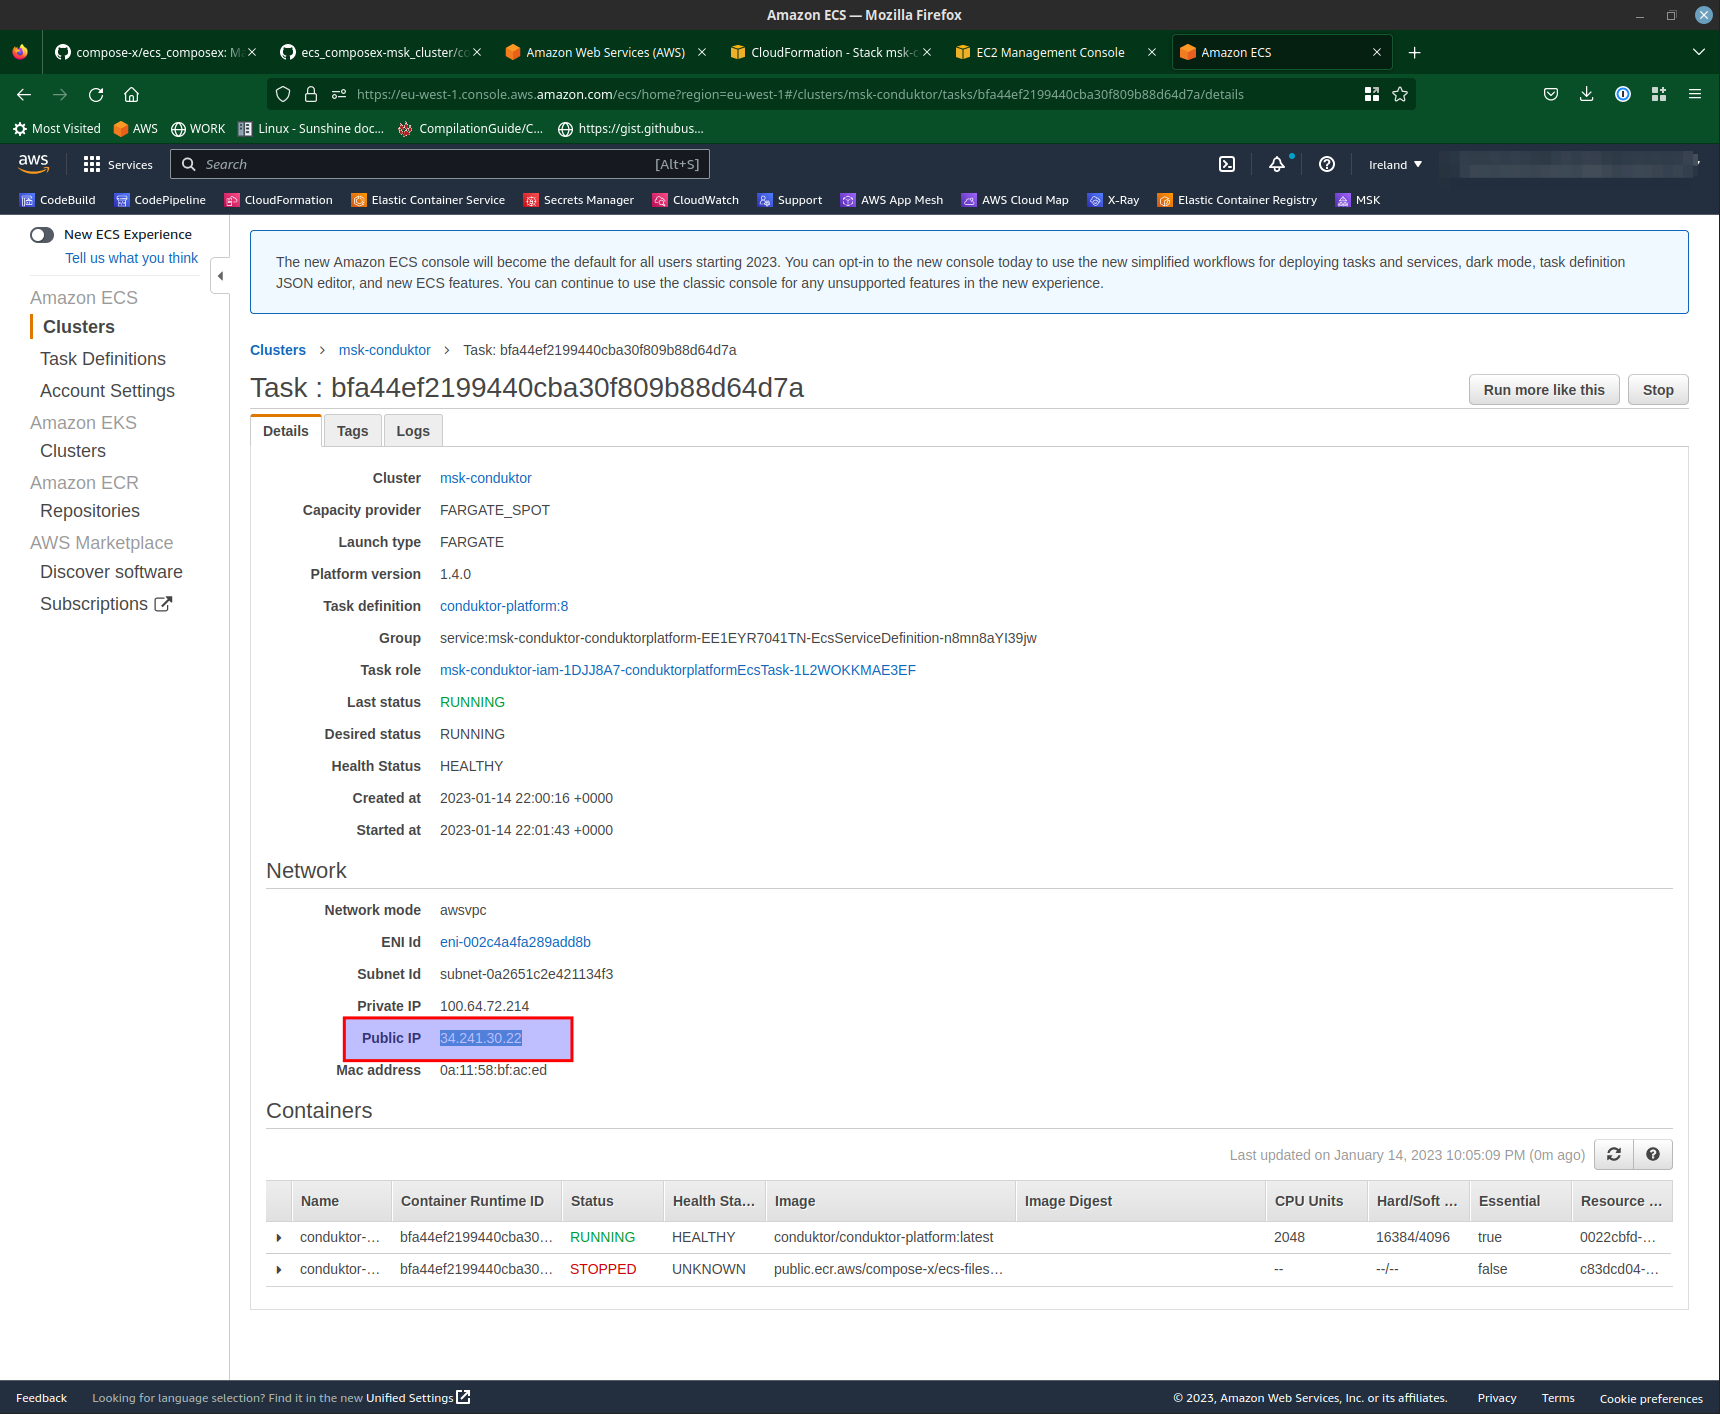
Then we go to Tasks and we select the one running. Identify the public IP address assigned to the container.
From there, we connect to Conduktor. Use the username password as shown above or the ones you set if you used something else.
Head to the Console, and from there we can see our Cluster, create topic, and publish/consume messages. The authentication from Conduktor to MSK is done over IAM, so there are no username/password to set.
And that’s it. You have successfully deployed a new MSK cluster and connected a service to it.
Some tips & final reflections 
Conduktor without MSK? 
If you want to deploy Conduktor using ECS Compose-X without creating a new MSK cluster, simply comment out the whole x-msk_cluster section out of the compose file, and run the same command.
Use an existing MSK cluster? 
If you want to do that using an existing MSK Cluster, you can see an example in the use-cases test files Yes, the x-msk_cluster module allows to connect to existing clusters, with all the similar features as when creating one.
Future for x-msk_cluster module 
This module is very new, and the first one to have been created as a standalone for ecs-compose-x. As a proof-of-concept, this is proving that anyone can create their own modules and therefore add any AWS resources they wish so long as their is AWS CloudFormation support for it.
A ecs-composex_cookiecutter is in progress to allow users to get started very quickly with authoring new modules.
Requisites 
An AWS Account
Python >= 3.8 ECS Compose-X: >= 0.23 ECS Compos-X MSK: >= 0.2
The Conduktor Platform version at the time of writing is 1.9.1